


Mastering the layup process is the cornerstone of creating a durable, high-performance boat hull from composite materials. Many DIY builders and professional shipwrights alike often struggle with achieving a consistent thickness or finding that "perfect" balance between weight and strength during construction. If you have ever dealt with uneven surface textures or areas where the fiberglass feels too heavy in some spots and too thin in others, you know how critical precise execution is to the final result.
This guide will walk you through the essential stages of boat hull construction to help you achieve professional results. You will learn how to properly prepare your mold, the specific techniques for applying glass fiber layers, and how to manage resin wet out effectively. By understanding these core principles of composite material layering, you can ensure a smooth, structurally sound hull that stands up to the demands of the water.
In this article:
- Understanding the layup process basics
- Preparing the hull for glass fiber layers
- Techniques for applying glass fiber layers
- Managing resin wet out and air bubbles
- Curing and finishing the hull surface
- Frequently Asked Questions
- Final Thoughts
Understanding the layup process basics
At its core, the layup process is the fundamental method used to transform loose fibers into a rigid, durable structure. In boat hull construction, this involves layering glass fibers—which provide the structural strength—and saturating them with a liquid resin, such as polyester or epoxy. When these two components combine, they form a composite material where each part plays a specific role: the fibers act as the "skeleton," resisting tension and compression, while the resin acts as the "connective tissue," holding the fibers in place and distributing the load across the entire surface.
How Composite Material Layering Works
The beauty of the fiberglass layup technique lies in its versatility. Unlike wood or metal, which have fixed properties, a composite hull can be engineered by controlling how many layers are applied and in what direction they run. By stacking glass fiber layers strategically, builders can create a hull that is lightweight yet capable of withstanding the significant pressures of open water.
The Mechanics of Resin Wet Out
A critical component of the layup process is achieving proper "wet out." This occurs when the resin flows into every microscopic gap between the individual glass filaments. If the resin does not fully penetrate the fibers, the hull may have weak spots or inconsistent weight distribution. Achieving a perfect balance ensures that the final composite material is uniform, providing a smooth surface and high structural integrity.
Benefits of the Layering Approach
- Layering allows for "tailored" strength, where you can add more fibers to areas of the hull that experience the most stress, such as the bow or the keel.
- The process allows for complex curves and shapes that are difficult to achieve with traditional timber construction.
- Because it is a building block method, builders can adjust the thickness of the hull during the layup process without changing the overall shape of the boat.
Preparing the hull for glass fiber layers
The success of your boat hull construction depends heavily on how well you prepare the surface before the first layer of glass fiber is applied. A smooth, clean mold ensures that the composite material adheres uniformly, preventing weak spots and uneven textures in the final finish. If the surface is inconsistent, these imperfections will be magnified across every layer added during the layup process.
Cleaning the Mold Surface
Before any physical work begins, the mold must be free of dust, oils, and moisture. Any lingering residue from the manufacturing process can prevent the resin from bonding correctly to the fiberglass.
- Wipe down the entire surface using a degreasing agent or a simple mixture of water and mild soap to remove fingerprints and manufacturing oils.
- Use compressed air or a lint-free cloth to blow away fine dust particles that might settle into the corners of the mold.
- Ensure the mold is completely dry before proceeding, as trapped moisture can cause bubbles to form during the initial resin application.
Sanding for Texture and Adhesion
Sandpaper is an essential tool in the fiberglass layup technique, used to create a "tooth" on the surface that helps the resin grip the material.
- Start with a medium-grit sandpaper to remove any minor imperfections or ridges left by the mold's original shape.
- Follow up with a fine-grit sanding pass to smooth out the surface, ensuring it is ready for a high-quality finish.
- Use a tack cloth after sanding to pick up every remaining grain of grit, as even tiny particles can create small bumps in the hull.
Priming and Sealing
Applying a primer serves as the bridge between the mold material and the composite layers, providing an even distribution of resin.
- Apply a thin layer of gelcoat or primer to seal the surface pores of the mold.
- Ensure the primer is applied evenly to avoid "pooling" in deep curves or sharp corners of the hull design.
- Allow the primer to cure fully before starting your composite material layering, as this provides a stable foundation for the glass fiber layers.
Techniques for applying glass fiber layers
The success of boat hull construction depends heavily on how you apply the glass fiber layers to the mold. Choosing between manual and mechanical methods is one of the first decisions a builder must make, as each technique offers different trade-offs regarding precision, labor intensity, and final structural integrity.
Hand Layup Technique
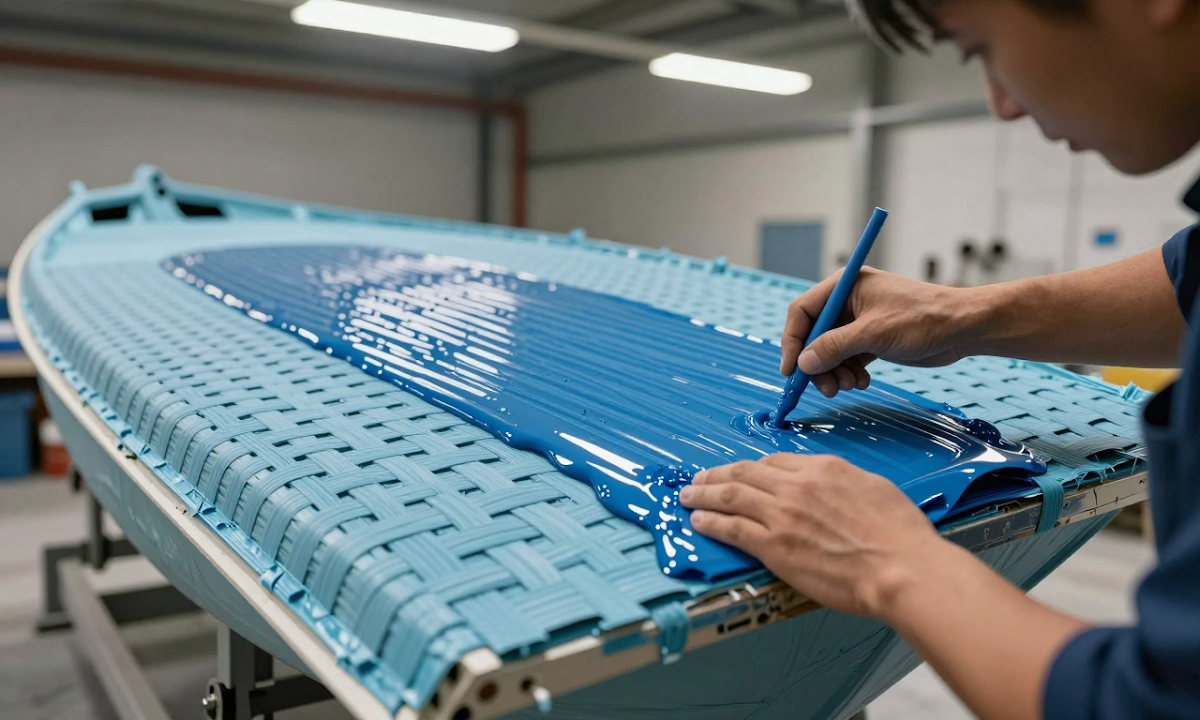
The hand layup process is the traditional method where fibers are placed into a mold and saturated with resin using manual tools. It is highly versatile and allows for significant customization during the construction of the boat hull.
- Builders use brushes, rollers, and squeegees to work the resin into every crevice of the glass fiber layers.
- This method provides excellent tactile feedback, allowing you to adjust the thickness and orientation of the fibers in real-time.
- Hand layup is ideal for complex curves and intricate details where a machine might struggle to reach perfectly.
- The primary drawback is that it relies heavily on the skill of the builder; inconsistent pressure can lead to variations in thickness across the hull surface.
Machine Applications
For larger productions or hulls requiring extreme uniformity, machine applications such as spray layup and filament winding are often preferred. These methods use mechanical force to ensure consistent results over large areas.
- Spray layup involves spraying a mixture of resin and glass fibers simultaneously onto the mold, creating a very even distribution of material.
- Filament winding uses a rotating mandrel to pull continuous strands of fiber through a resin bath, resulting in high-strength hulls with very consistent thickness.
- These techniques are less labor-intensive for large surfaces but offer less flexibility for making "on-the-fly" adjustments compared to hand layup.
- Machine applications generally reduce human error, ensuring that the composite material layering is perfectly symmetrical and repeatable across multiple boat builds.
Managing resin wet out and air bubbles
Achieving a perfect layup requires ensuring that every individual fiber within the glass fabric is fully saturated with resin. This state, known as "wet out," is critical because it transforms loose fibers into a cohesive composite structure. When fibers are not fully saturated, the hull may have dry spots, leading to uneven weight distribution and potential structural weaknesses during operation.
Methods for Achieving Complete Wet Out
The most common way to manage wet out is through consistent manual application. Using a brush or squeegee allows you to push resin into the weave of the glass fiber layers, ensuring that the liquid reaches the innermost strands. For larger boat hull construction projects, using a roller can help distribute the resin more evenly over a wider surface area, pressing the fibers down while simultaneously forcing out excess fluid.
Eliminating Trapped Air Bubbles
Air bubbles are the primary enemy of a smooth, durable finish. If left unchecked, they create tiny pockets of weakness and can lead to "dimpling" on the hull surface. To manage these, you must use a combination of rolling and tapping techniques during the layup process.
- Use a ribbed roller to press the fibers against the mold, which helps squeeze air out from between the layers.
- Tap the hull lightly with a rubber mallet or your hand to encourage large bubbles to rise to the surface and pop.
- Perform "working" motions where you move the brush in different directions to ensure no pockets of air remain trapped in the weave.
- Consider using a vacuum bag if the project allows, as it pulls air out uniformly across the entire hull surface.
The Importance of Layer Consistency
Consistent resin distribution prevents the glass fiber layers from bunching up or overlapping unevenly. By managing both wet out and air removal systematically, you ensure that the composite material layering provides maximum strength and a professional-grade finish.
Curing and finishing the hull surface
Once the layup process is complete and the resin has been distributed across all glass fiber layers, the hull enters the curing phase. Curing is the chemical process where the resin transitions from a liquid state to a solid, durable structure. Depending on the type of resin used—such as polyester, epoxy, or vinylester—the curing time can vary significantly. While some resins may begin to set within minutes, achieving a full "hard" cure often requires several hours or even days of undisturbed time.
Maintaining a consistent temperature during this stage is vital for a high-quality finish. If the environment is too cold, the resin may become tacky; if it is too hot, it might cure too quickly and develop internal stresses. For large boat hulls, allowing the composite material layering to settle at room temperature ensures that the fibers are locked into their final positions without warping.
Sanding for a smooth surface
After the hull has fully cured, the transition from a raw composite structure to a finished boat surface begins with sanding. This step is essential for removing imperfections left by the layup process, such as ridges, small pits, or slight unevenness in the fiber distribution.
- Start with a coarse-grit sandpaper to level out the major high spots and irregularities across the hull surface.
- Progressively move to medium and fine grits to refine the texture and create a consistent, uniform plane.
- Use a sanding block or orbital sander to ensure that the pressure remains even, preventing "dips" in the flatter sections of the boat.
- Pay close attention to the curves and transitions, as these areas often require more deliberate movement to achieve a seamless flow.
- Perform a final light sanding with a very high grit to prepare the hull for primer or a gelcoat application.
A well-sanded hull provides the perfect foundation for the final aesthetics of the boat. By taking the time to move through these stages methodically, you ensure that the underlying strength of the fiberglass is complemented by a professional, mirror-smooth finish.
Frequently Asked Questions
How many layers of glass fiber are needed for a boat hull?
The number of glass fiber layers required for a boat hull depends entirely on the vessel's size, intended use, and desired durability. Small kayaks typically require 2 to 4 layers, while larger sailboats or powerboats often utilize 6 to 10 layers. Choosing the correct amount ensures a balance between structural integrity and maintaining a lightweight profile.
Final Thoughts
Mastering the layup process is the foundation of high-quality boat hull construction, ensuring a structure that is both durable and lightweight. By focusing on meticulous surface preparation, consistent glass fiber layers application, and effective management of resin wet out, you can achieve a professional finish that withstands the demands of the water. Understanding these core elements allows for more predictable results and fewer structural surprises during your build.
To begin your journey into composite material layering, take one small first step tonight: choose your hull design and gather a few samples of different glass fiber weaves to see how they feel and look in your hands.


